|
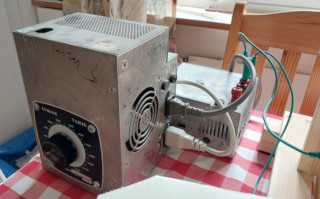
The power supply: I used the same power supply through all iterations
of the hot wire cutter. A simple toroidal transformer that outputs 24 VAC
with certainly more than enough current capacity (I don't actually remember
what I got this transformer for, originally) fed by a Lübcke Vario
R52-260-T Variac which I've had in my
electronics lab for quite a while, since rescuing it from a dumpster at
my old university.
This is by no means a sensible way to power a hot wire cutter, but it was
immediately available, and works just fine. I usually set the variac to
about 30 V output (giving just over 1 V from the following
transformer), but that will depend on the thickness of the wire
in the cutter. Mine is probably on the thick side, as far as hot wires go.
Some kind of low-voltage high-current SMPS should not be too difficult to
design, if you don't have a variac on hand. Or I wonder if an old-school light
dimmer might work in place of the variac.
|

|
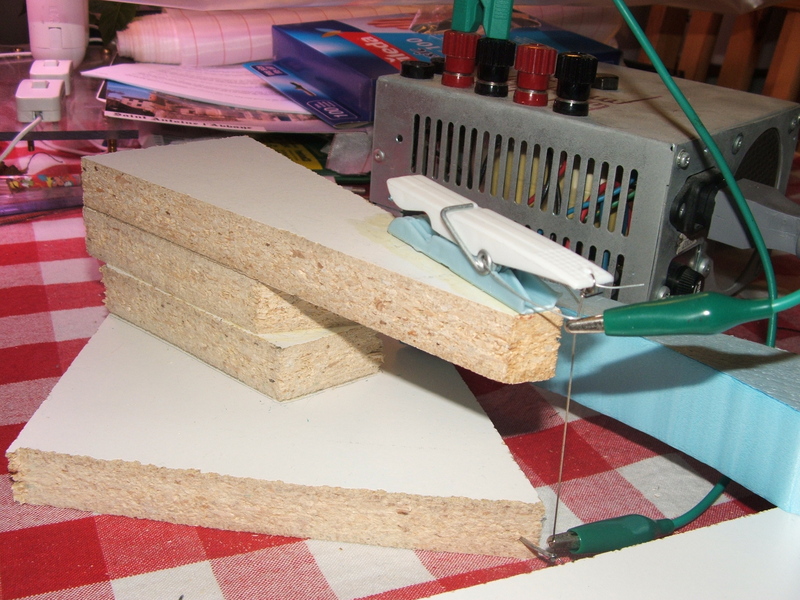
The first generation cutter: This was made of particle board
scraps and a clothes pin, clued together! Cobbled together in 10 minutes
or so. But the wire was some "actual"
resistance wire, for whatever that's worth... Rather thick, though, so
it required some serious current at low voltage. Of course, any uninsulated
wire would do, regardless whether it's Nichrome or Kanthal or plain old
iron or steel (well, maybe not copper, though).
The wire is contacted electrically by alligator clips, placed between the
physical connection points, so as not to needlessly heat those up—the
plastic clothes pin, used to keep tension on the wire, would soon melt
otherwise!
You can see the jaw is not terribly big, and there's precisely nothing at
all to adjust. I mostly used it for cutting
freehand, or clamped some simple
guide rail onto this thing if I needed uniform, straight pieces of foam core.
|
 |
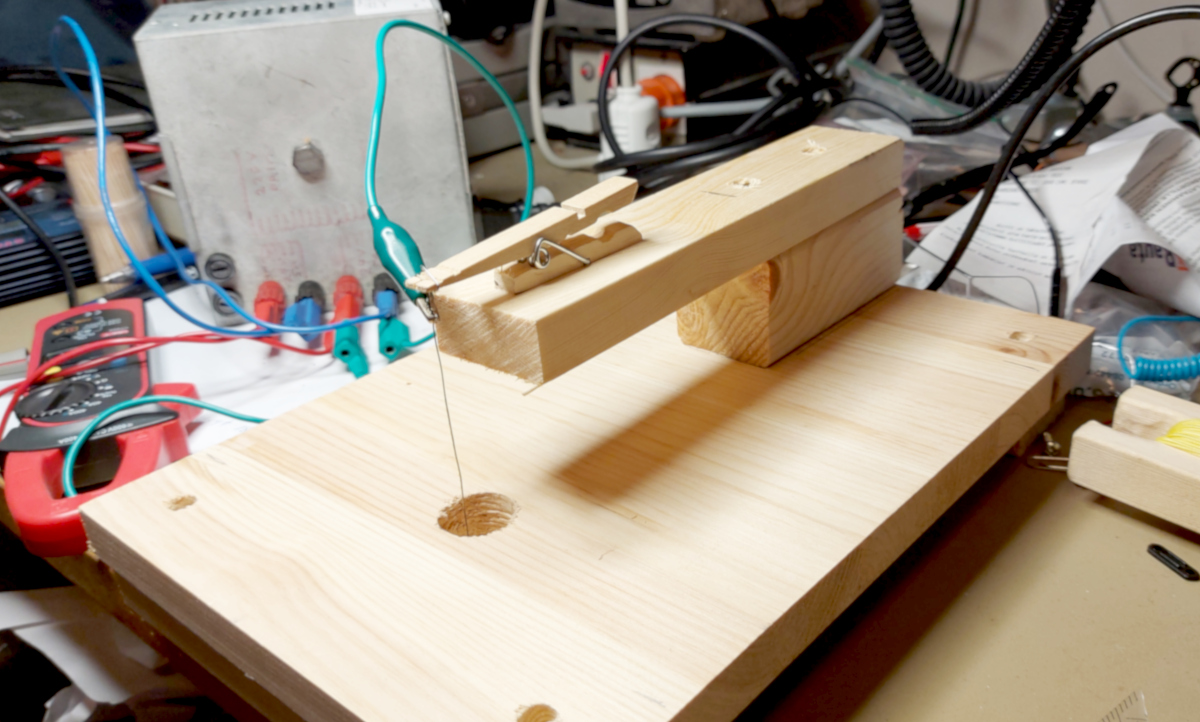
The second generation cutter: Having misplaced the first cutter,
and finding myself needing one again, I jury rigged this one in about the
same time as before, again of materials immediately on hand. This one has
a slightly larger jaw, but in most other respects it's only marginally less
awful than the original. Still sporting the clothes pin and alligator clips.
I did connect the lower end of the wire to a moveable block underneath the
base board. With the sizeable hole in the base board, this allowed me to fine
tune the wire to make it actually vertical with some accuracy. Nothing holds
that lower block in place, though (other than the tension on the wire, and
friction against the base board), so it's also prone to losing its fine
adjusted vertical setting.
|

|
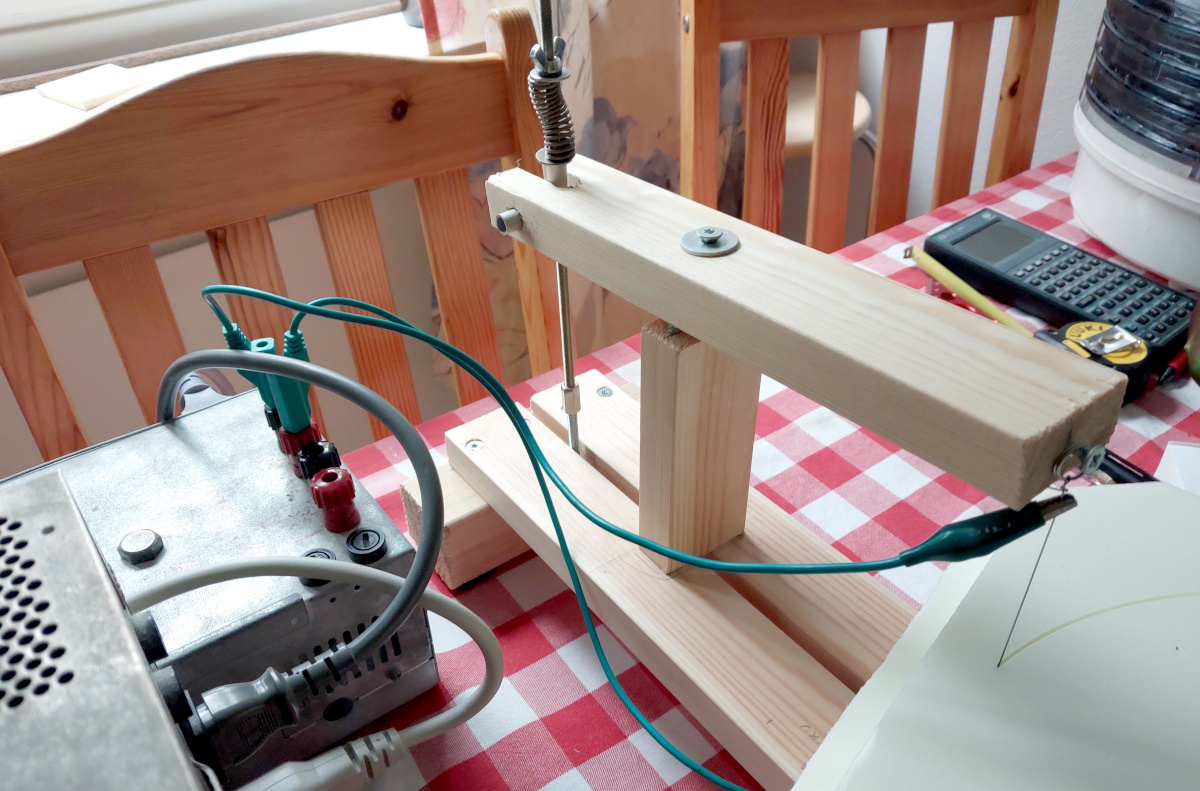
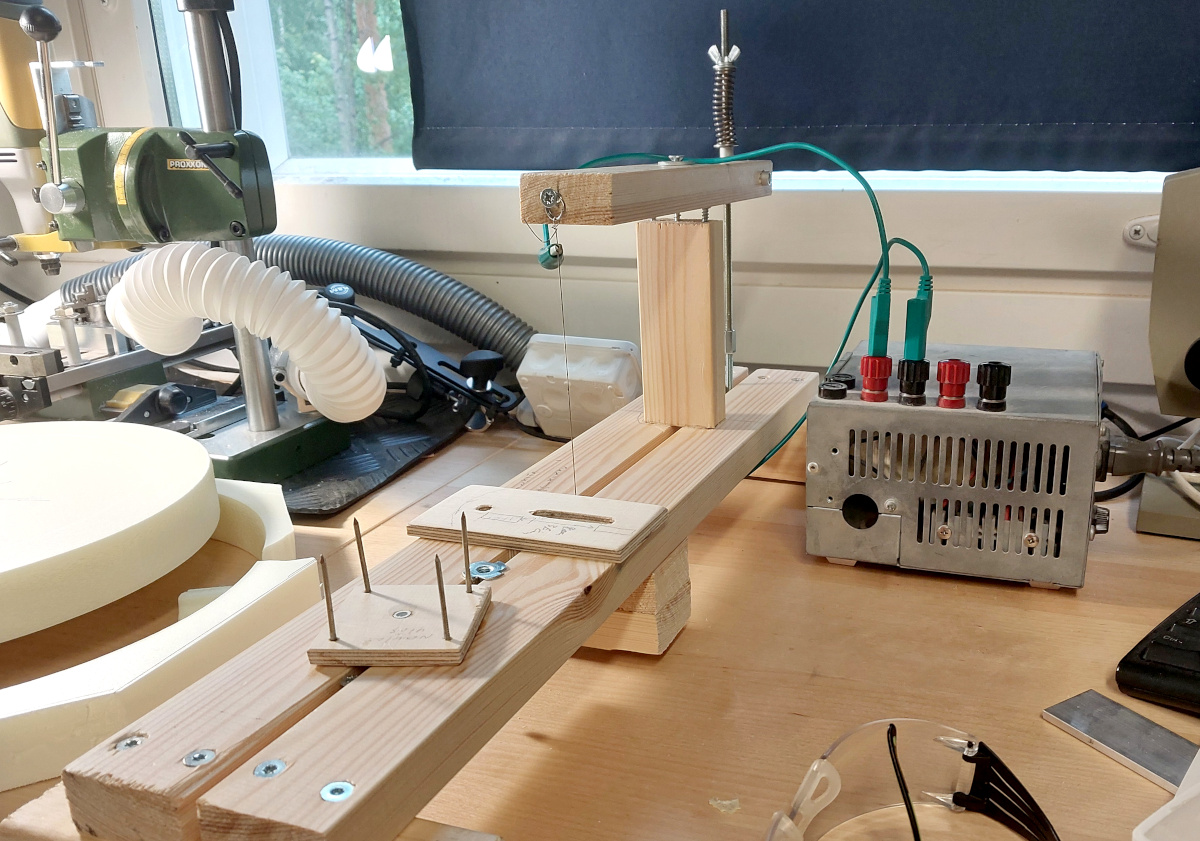
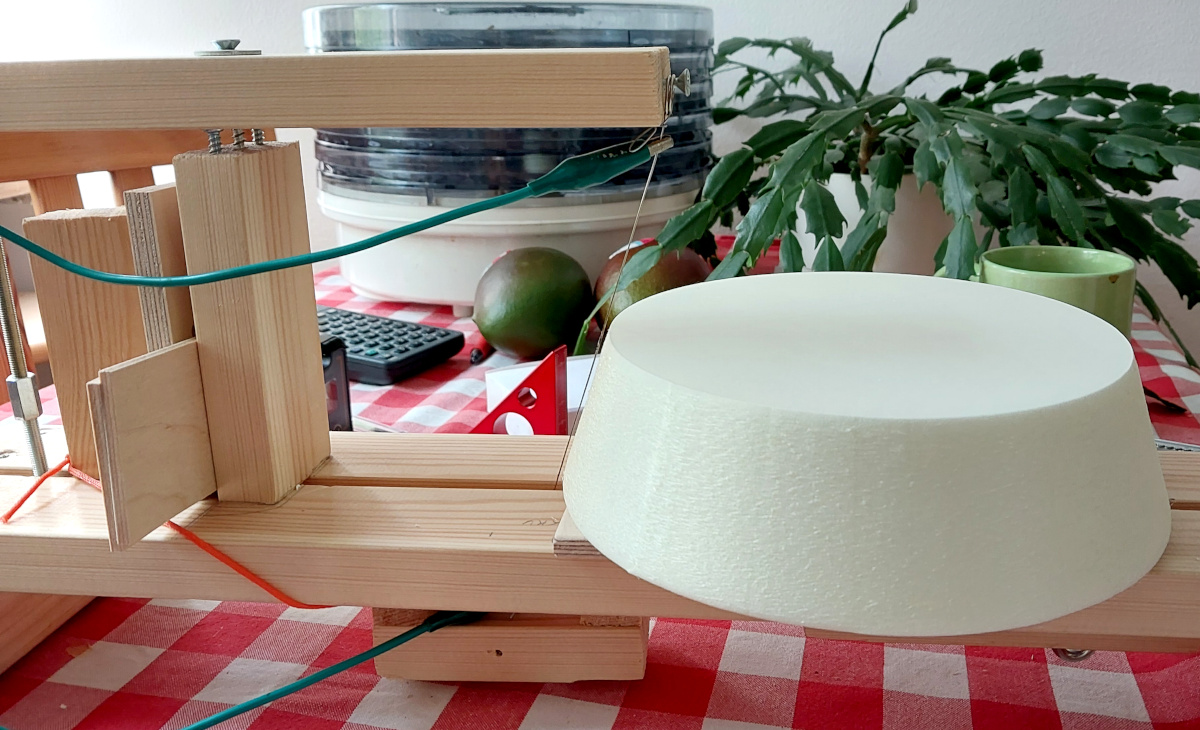
The third generation cutter: I found myself needing rings cut out of
EPS ("Finnfoam"), so I finally went to the trouble of actually
designing a hot wire cutter for that purpose. (The same cutter will,
of course, work just as well for freehand and straight pieces as the earlier
two generations.)
I think the photo
(and the following photos) says it all. There are two lengths of wood with
a gap between them. An axle piece with four nails sticking up from it is
pushed into the EPS sheet, and it provides a pivot point around which the
sheet can be turned through the wire to make accurate circles (see
this photo).
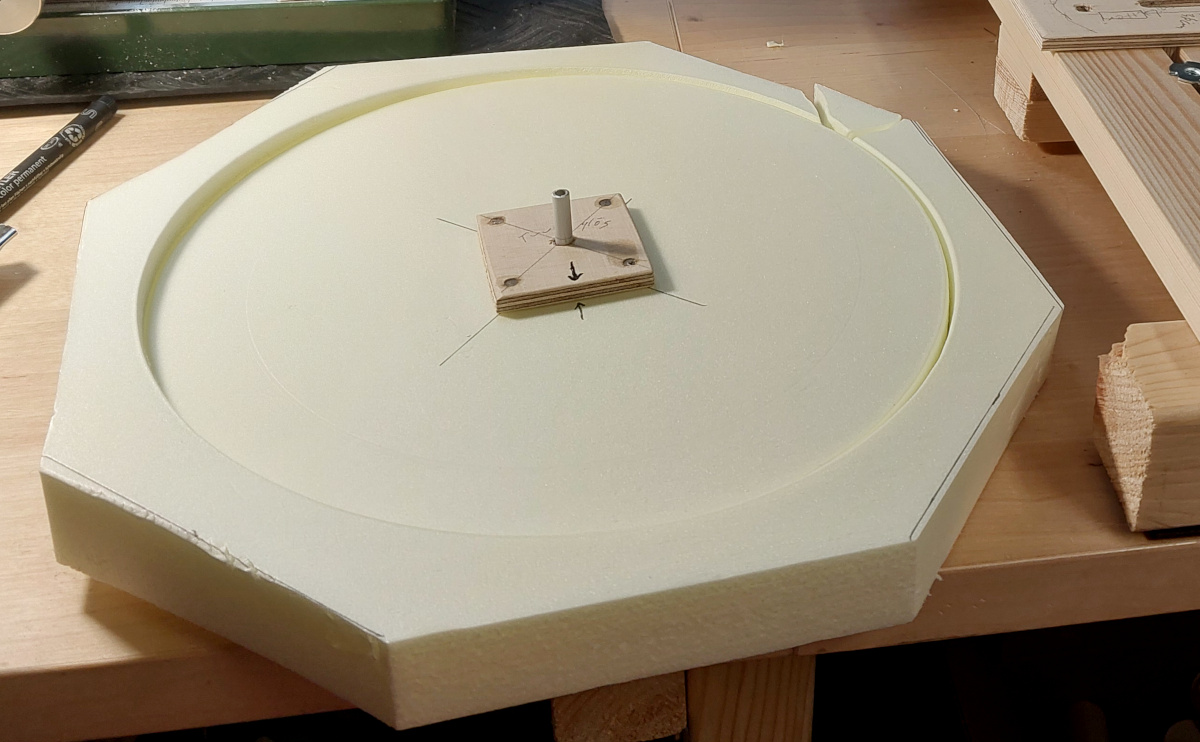
That axle can move back and forth along the gap
between the wooden pieces, and adjustable stoppers in the groove are used
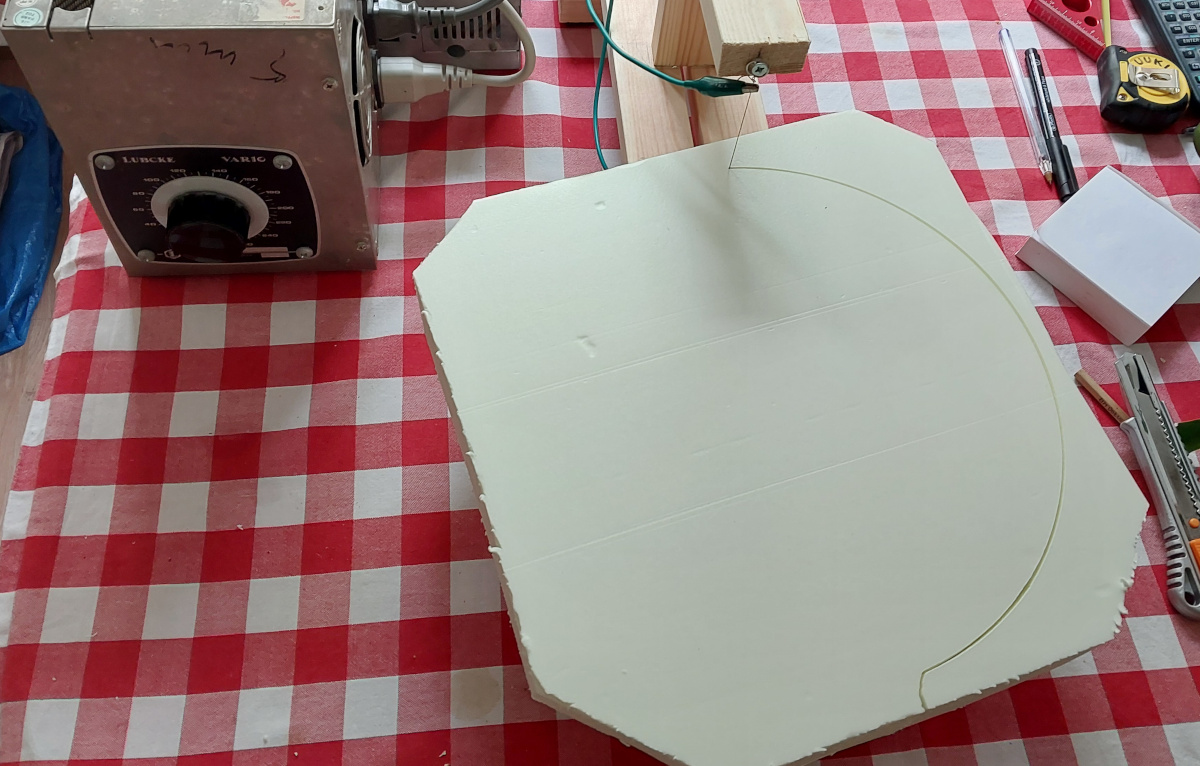
to set the radius of the circle. This way I can heat up the wire, push the
raw EPS sheet into the wire until I hit the stopper, turn the circle
(as in this photo), and
pull it out again—this leaves no unsightly grooves at the starting point
of the circular cut. I can also start from a pre-drilled hole on the
inside of the disc, pull the raw sheet backwards to the pre-set
radius, turn the inner circle, and push out again, to obtain a ring
of EPS. (Of course this does
require disconnecting the wire and threading it through that pre-drilled
hole, and disconnecting it again after cutting.)
The jaw is bigger than in the earlier versions, and comprises a vertical
block of wood, on which a horizontal beam is hinged, and tensioned by an
adjustable compression spring, as you can see in
this photo. The hinge
is nothing more than two round-headed screws protruding from the vertical
block, sitting in holes ground into the horizontal beam. The single screw
and washer you can see in the photo only keeps the beam from falling off
when the wire is unhooked.
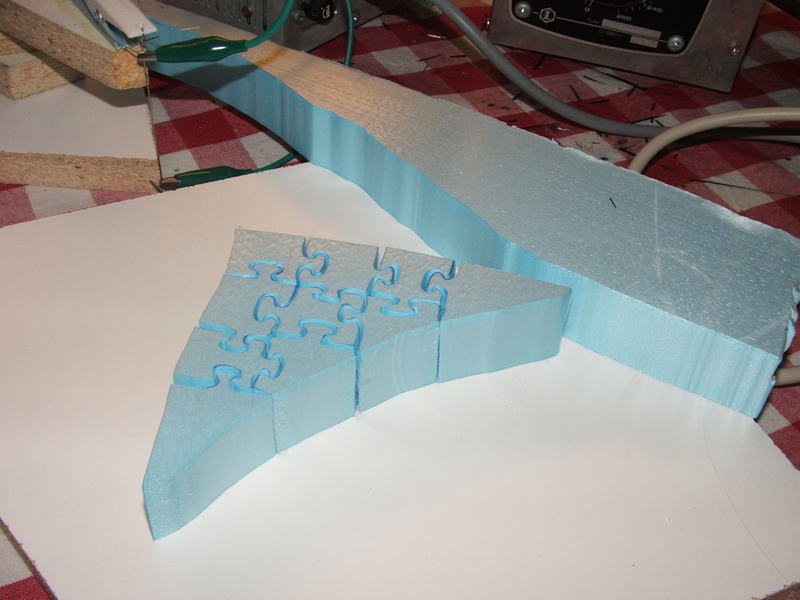
The lower
end of the wire is held by a moveable block (as in the second generation
cutter), and by changing its position, you can even cut conical
parts as in this photo.
(If the angle is off 90° by very much, that block will try to slide
back towards the 90° position, unless held by some makeshift cord
arrangement—that orange cord you see in the photo—adjusted by
adding or removing blocks of wood behind it. Not all too convenient, but
workable.)
And yes, the power supply
is still connected with alligator clips.
|
