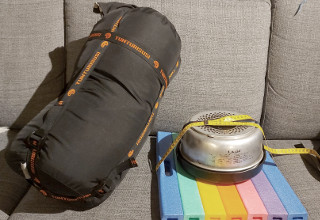
To make it more comfortable to carry as a backpack, I wanted to make room inside for a foam seat pad (that rainbow colored thing, which is also useful for sitting) which would also act as a back panel. Thus I had to make my new sack some 5 cm bigger in circumference (as determined by the yellow tape measure in the photo). I also made it some 5 cm taller. Not only do these give more room when using it as a backpack, but the sleeping bag can also be stored in a slightly less compressed state at home. With all the compression straps, I can easily compress it to fit inside my actual backpack without any problems. And as an added bonus, this sack won't suddenly be too tight in case I buy a new, slightly fluffier sleeping bag (not that I'm likely to wear out my current Tunturisusi 2000 any time soon). It is now quite oversized for my QTM 900 summer sleeping bag, however, but I've only ever needed this kind of day pack on winter trips. I rarely stay put in the same camp on a summer hike.
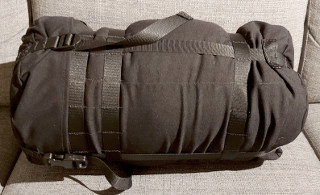
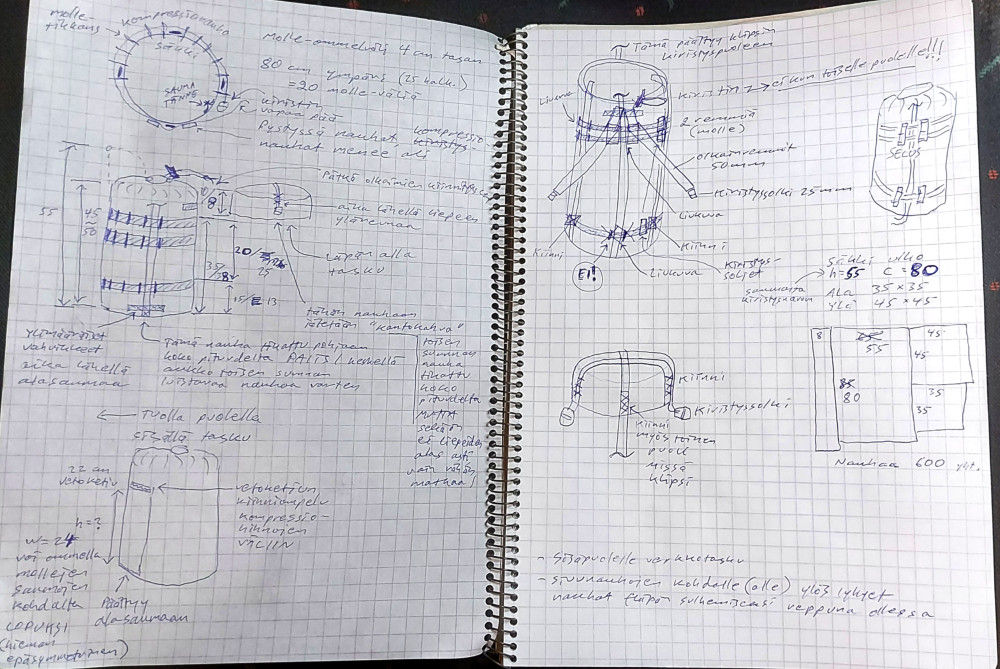
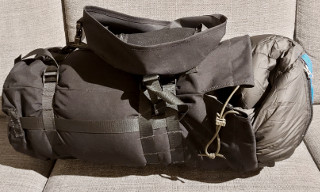
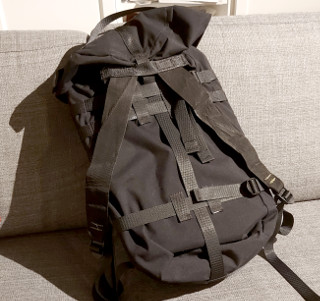
There are four lengthwise compression straps evenly spaced along the circumference of the sack, just like there are in the original. Two straps (at the sides, when viewed as a backpack) are sewn to the sack at their bottom ends. When released from their tension locks in the top lid, these straps double as the lower halves of the shoulder straps for the backpack. The other two compression straps are actually one long strap, sewn to the top lid, but free to slide all the way around underneath the sack, with a single buckle near the top end. That buckle is on the outward-facing side of the backpack, and serves to tighten the whole strap. That way I don't need a separate tension lock for the strap that's against my back—which would probably press painfully against my spine or neck.
Three horizontal straps go around the whole sack. On the outward-facing side of the backpack, they are sewn to the sack following the Molle/PALS standard spacing, offering a place to attach an extra pocket or two if extra space is needed. The lengthwise compression straps can also be threaded through these Molle/PALS loops to help them stay in place. On the side facing my back, the horizontal straps are not sewn to the sack, and can thus be used as horizontal compression straps when the sack is used as a compression bag.
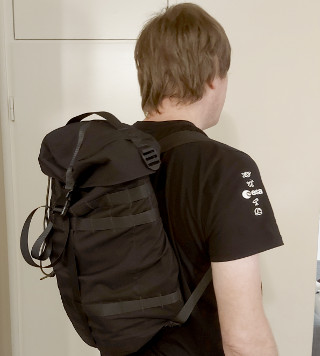
When the two side compression straps are released from their tension locks in the top lid, they can be threaded into the tension locks at the ends of the shoulder straps. This instantly turns the compression bag into a backpack!
With the side compression straps serving as the lower portions of the shoulder straps, the top lid was quite free to roll off to either side, so as a final finishing touch (not seen in the photo, as I had not done it yet), I sewed short straps on the sides near the top end of the sack. These can be threaded into the lid's side tension locks to keep it nicely in place.
I guess one could just sew shoulder straps onto an existing compression bag, but I said I overthought this. :)