
|
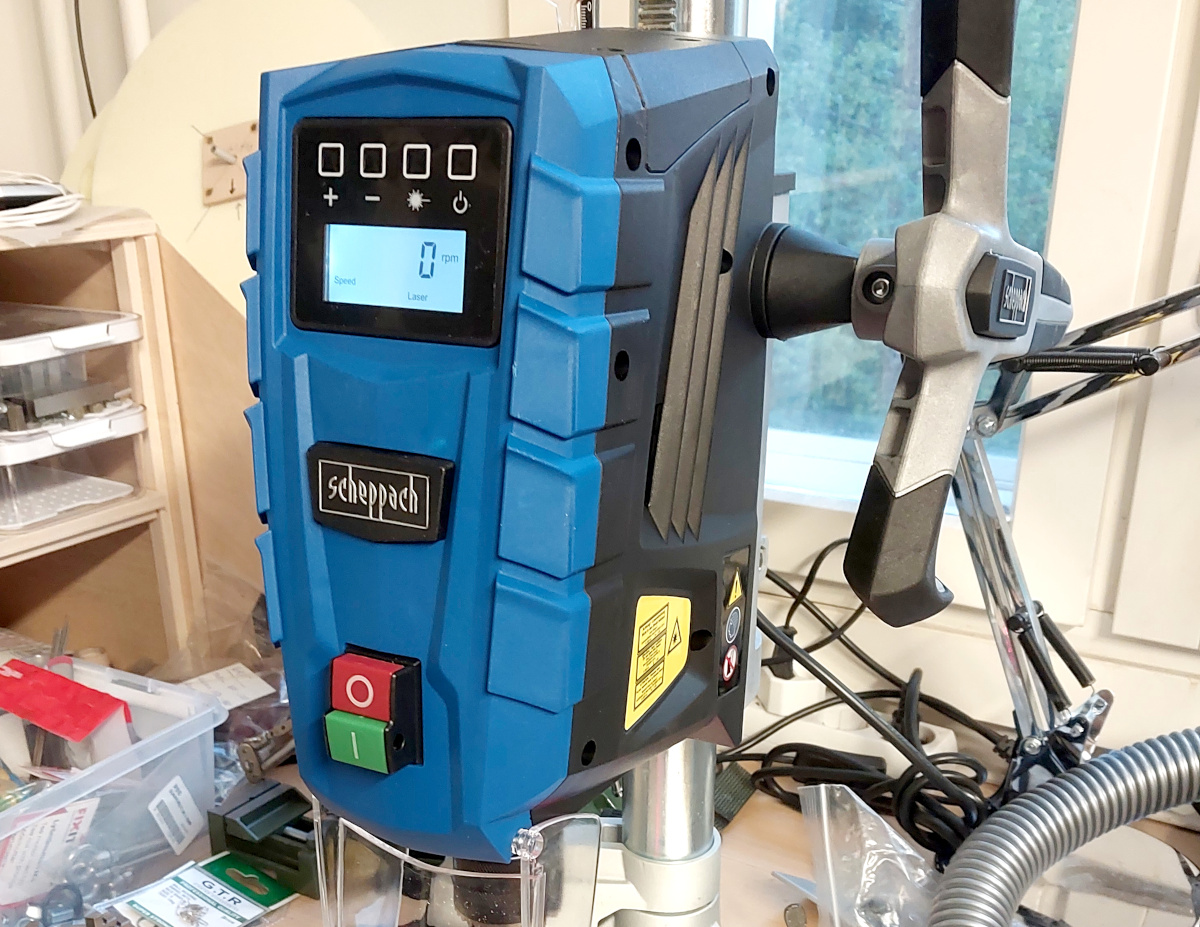
The motor unit: The motor is specified at 700 W, and is a Class-II
(double insulated) device, so it doesn't need even a safety grounded outlet.
Its speed is adjustable between 500 and 2600 RPM, and it provides ample
torque even at low speed, even when using bigger hole saws, for example. Its
speed does oscillate a bit with the biggest ones, though. But no real
complaints here,
other than the noise. The gearbox between the motor and the drill spindle (I
guess) is rather loud. If you think you've encountered a loud motor or loud
bearings in a belt driven drill press, you ain't heard nothing yet! It's ok at
500 RPM, just bearable at 1000 RPM, but crazy at 2600. I'll have to
take a look at that gearbox some time, just to see if it's lubed sufficiently.
But even if I do goop it up with grease, there's no way it
will ever be as quiet as any high quality belt driven drill press. But
it's certainly way more compact than any I've seen, which I do
appreciate a lot—otherwise I simply wouldn't have room for the thing!
And I rarely find myself using the higher speeds anyway.
This video,
among repair tips, gives a pretty realistic idea of how loud the drill
is (at around 4:30 in the video), if you compare it to the guy's voice.
One nice thing I noticed is that the drill remembers the last speed it
was used on, even if unplugged in between. You can just plug it in, hit
the green "ON" (or "I") button, and the
speed will be where you left it! You can even adjust the speed up and down
with the "+" and "−" buttons
without having to turn on the display.
The laser, however, will not turn on unless you turn on the display first.
There's just a bit of lateral wobble between the motor unit and the
column. It's a fraction of a millimeter at the distance of the drill bit.
The toothed rack on the column must be preventing the motor unit from rotating
around the column, and I guess there's just a bit of extra slop in the guide
rails against that toothed rack. I'll have to check if there's anything to
tighten up in there to reduce the slop. If I get around to it, that is, as
it doesn't seem all that critical in my use, really.
|
|
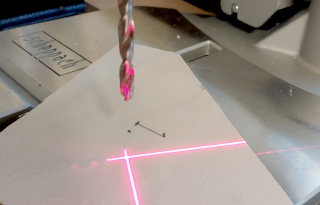
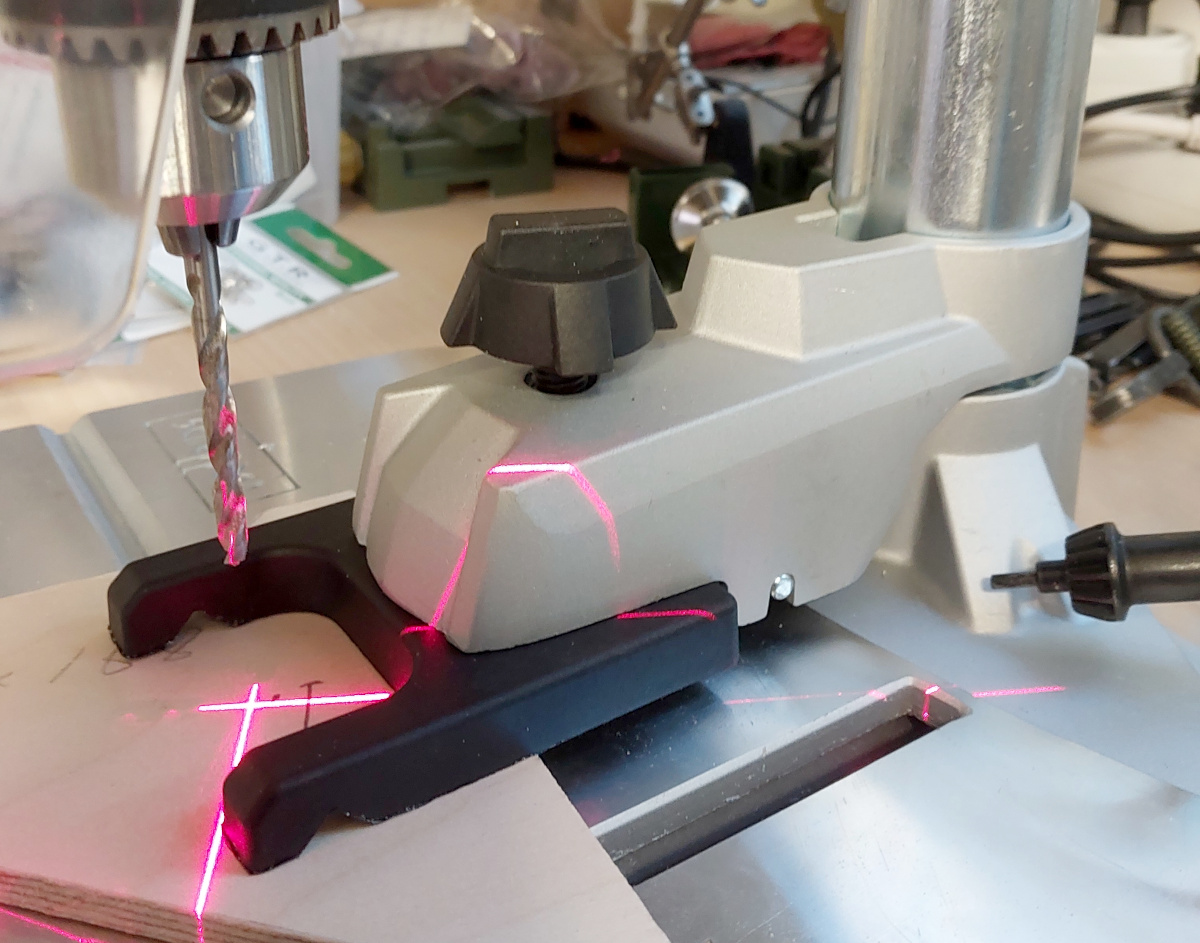
The laser: Pew! Pew! Wooooosh, Vroooommm, Pew-Pew-Pew-Pew-KABOOOMM!!!
With a hand wheel that looks like a spaceship, lasers are a
must! :) And they're reasonably well aligned, too.
They can be fine-adjusted as shown in
this video
at around 7 minutes.
This is actually the first drill press I've ever used that has laser
sights—err, alignment guides. (I didn't even realize line lasers
were used for the purpose—I
assumed a laser dot would be projected from off-axis, and that it would
have to be calibrated according to work piece height. But now it all makes
sense!) Until now, I had always used the old-school way: touch the work
piece with the drill bit, adjust, repeat, lather, rinse, dry and then
drill in anger. Just getting used to the idea of having laser sights
on a drill press is the bigger hurdle for me, being the dinosaur that I am.
Which is just as well, because the keyless chuck I swapped for the original
keyed one just slightly gets in the way of one of the lasers,
effectively rendering them useless. So I'll just keep with the old-school
method, which is hardly much slower or more tedious, and is more accurate
anyway. The convenience of the keyless chuck is far greater than the
convenience of the lasers, I feel. But maybe some day I'll look into moving
the lasers to better locations, who knows.
|

|
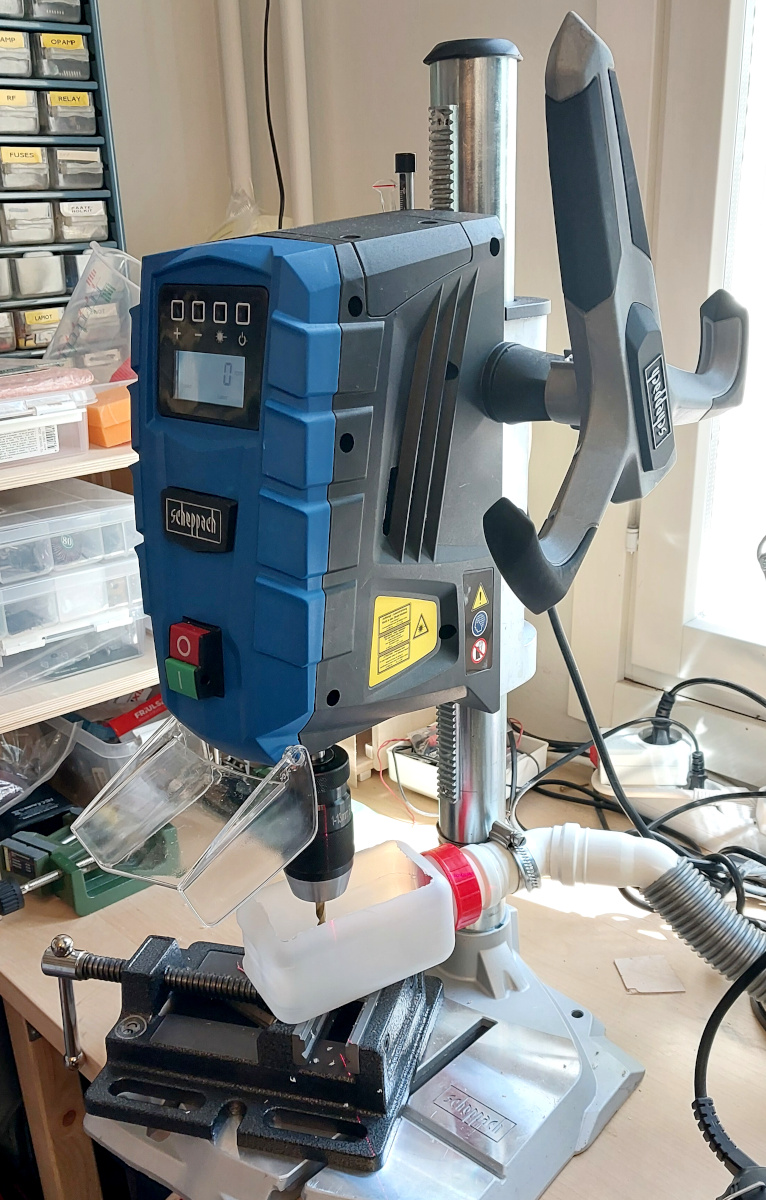
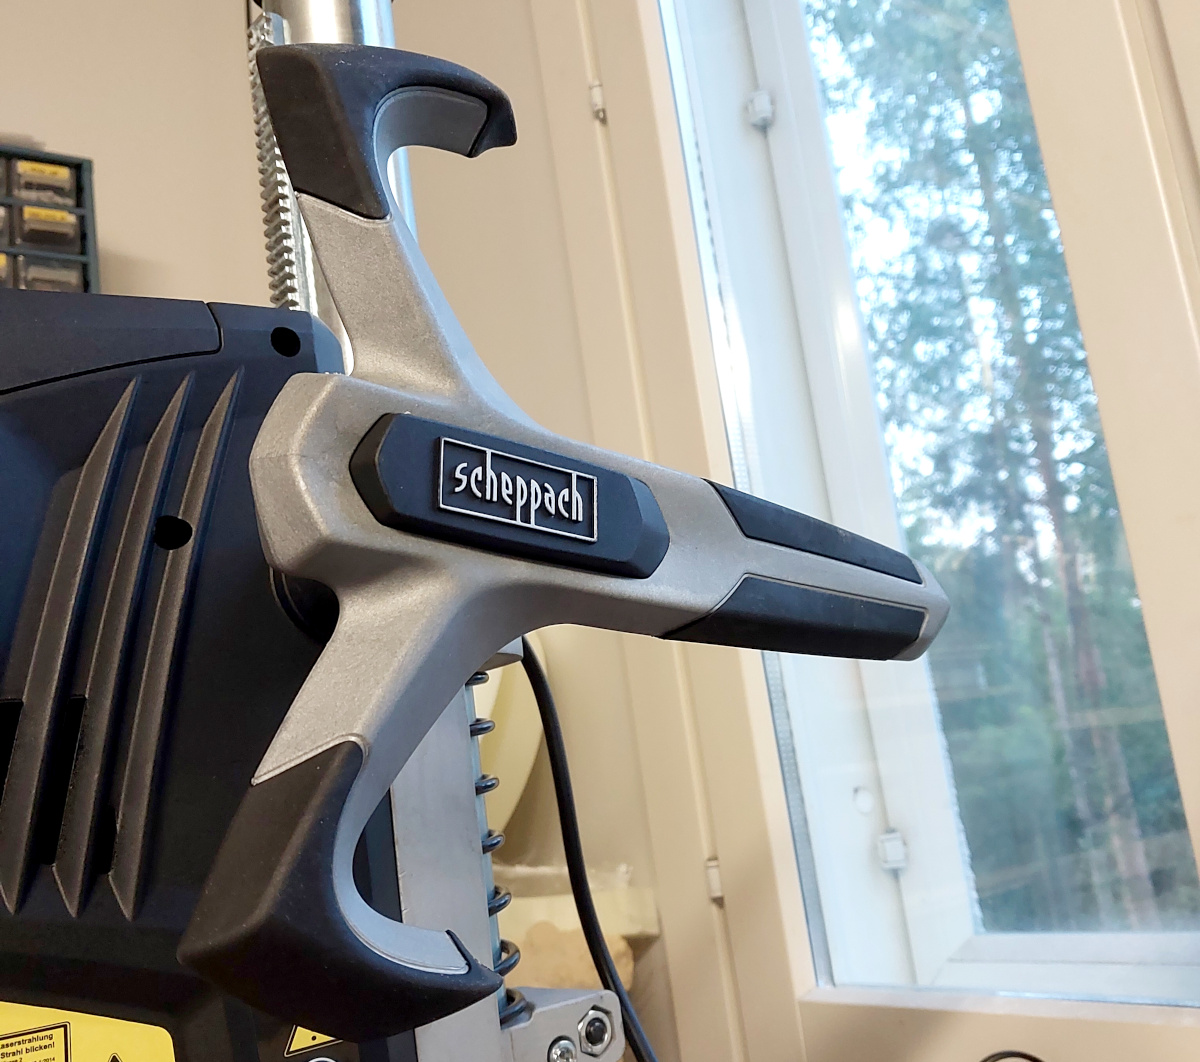
The stand: With a footprint of about 30 cm square, the base is
not terribly big, but it's stable enough. The combined base/table is
aluminum, which makes it light weight, but of course not nearly as strong
or rigid as a steel base. Its machined top surface is almost
planar, though not quite. The column attaches to the base with just two
screws, but it's stable enough for light duty use. The entire motor
unit, chuck and all, moves up and down the column smoothly enough by means
of the hand wheel, which looks like a
snazzy toy spaceship. It can move
way high enough for my purposes, but the jaw is only some 12 cm deep,
so be aware that it cannot drill holes further than that
from the edge of any board. Look up the specs on the Internet, I won't
repeat them here.
The column doesn't wobble (at least more than what might be expected
from the flexing of a light weight aluminum base) unless you're drilling
with a cheap, large-diameter hole saw. (Show me a drill press that
doesn't wobble with one of those...!)
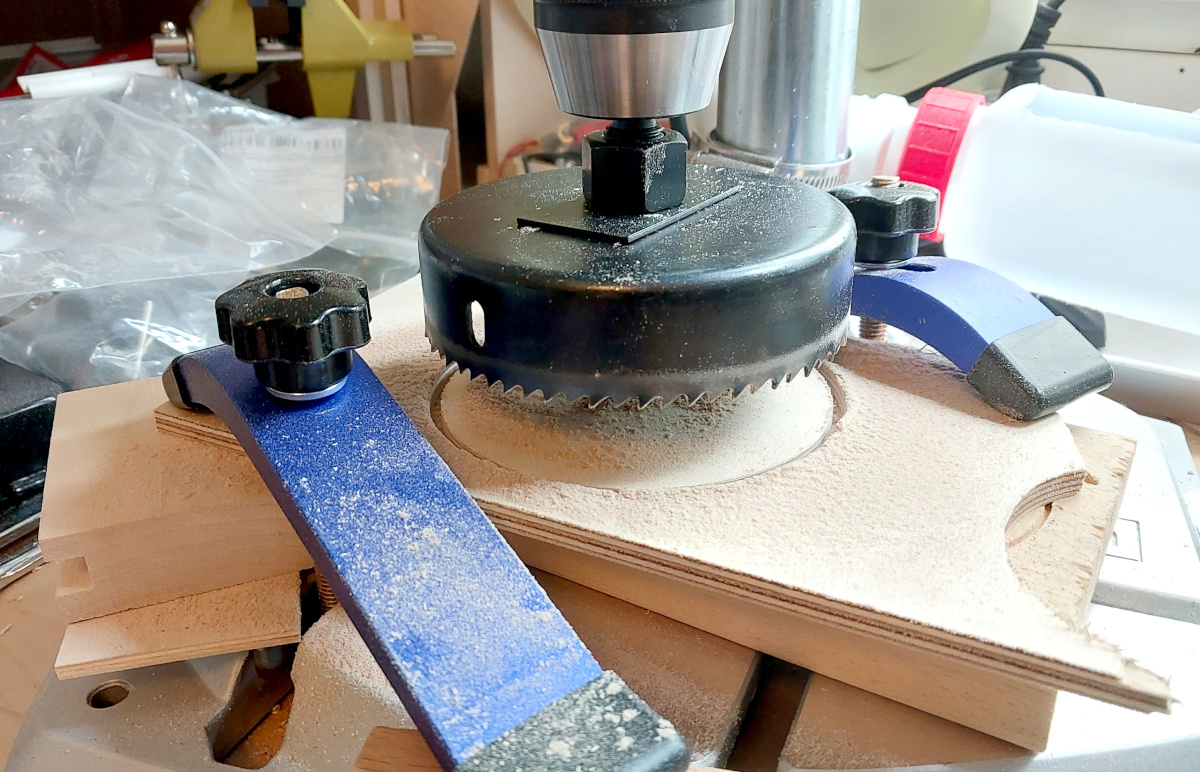
The clamp: There's a clamp
fitted onto the column, which will hold
the workpiece down against the table. The videos I saw on the Internet show
it in use, but it just looked very... plasticky. Well, color me surprised,
the tip of the clamp (the black part) is frigging plastic!!!
(The rest of it is quite nice aluminum, though.) I removed the whole thing
from the column, as it got in the way of the dust collection system
described below.
In addition to the plastic clamp, a piece of aluminum L-profile is provided,
with thumb screw attachment to the table. Extremely rudimentary, but
maybe actually useable for some purpose. (And not fscking plastic!)
|

|
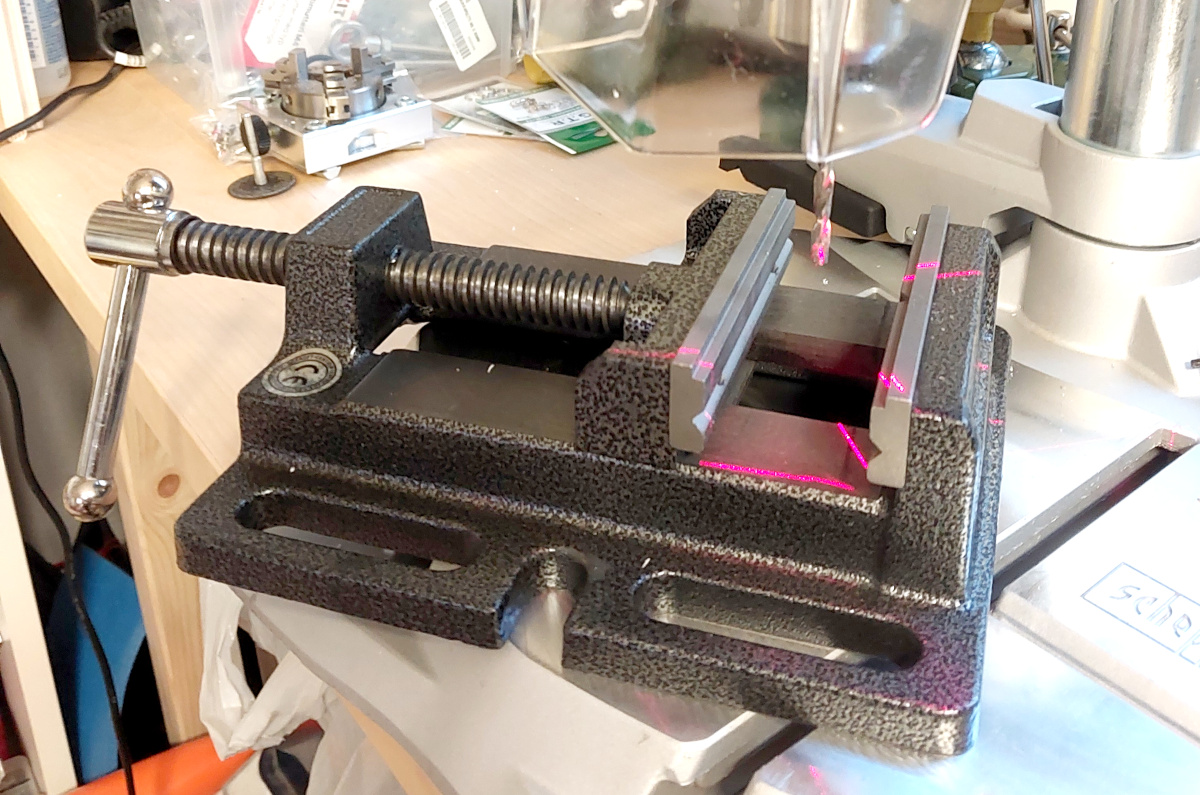
Of course, I bought a small machine vise
and haven't touched the included clamping accessories since. One thing is
annoying, however: the T-grooves in the table are spaced some 105 mm
apart, whereas many vises seem to have a spacing of 133 mm! (Huh,
that's 5 1/4 inches—does the standard come from floppy disks?)
Also, the slots on various vises seem to be for M12 hardware, whereas the
grooves in the table are only 10 mm wide. Is this a diminutive
version of some common standard hardware used on Big Machines? Oh
well, I've rarely needed to attach a vise anyway while drilling, even with
the bigger drill presses I once had at my disposal. I can make do.
I also ordered these
hold-down clamps (the blue ghings) in various sizes
from AliExpress. They will secure a work piece directly to the base very
well, although in most cases the vise is more convenient.
|

|
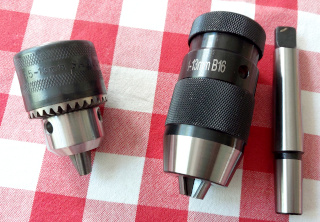
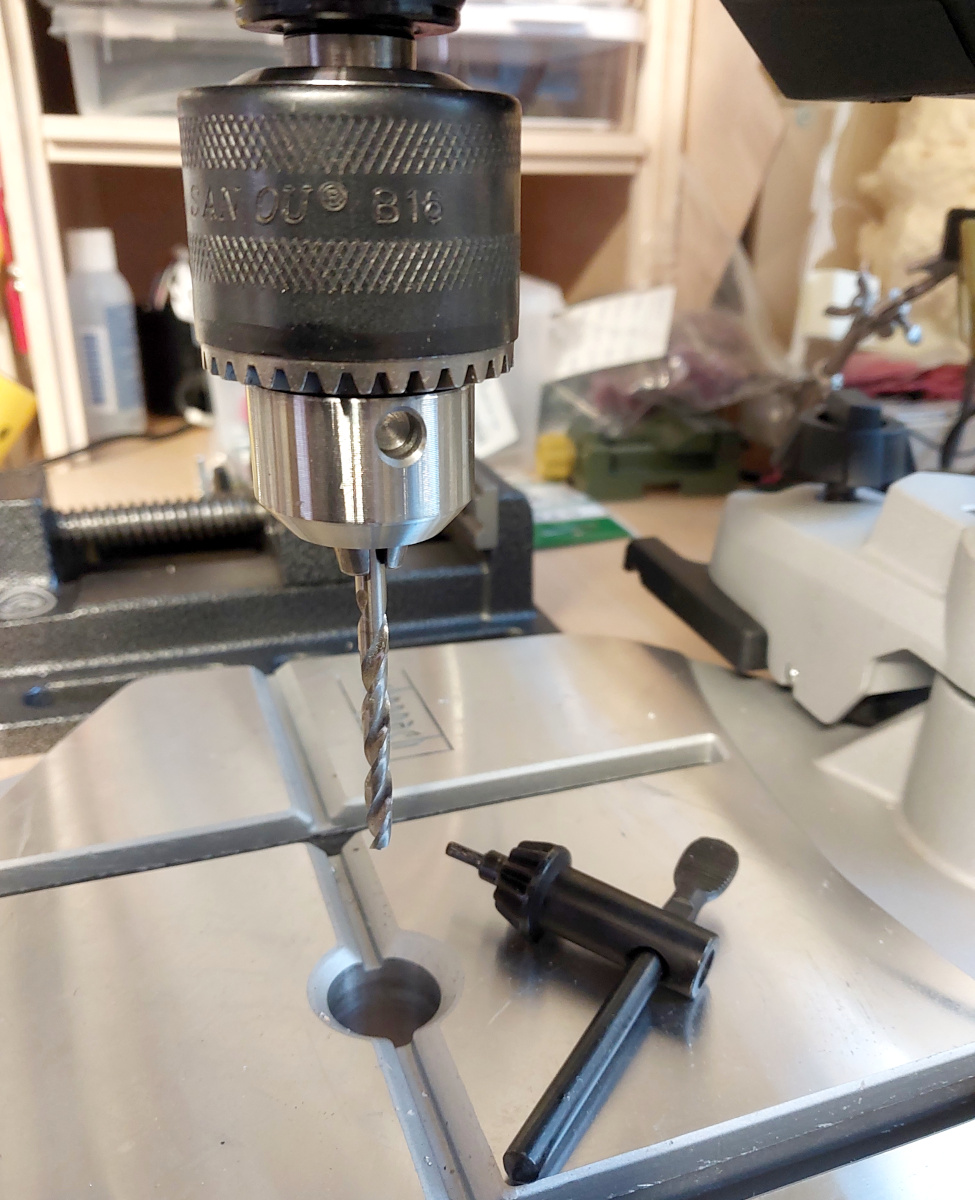
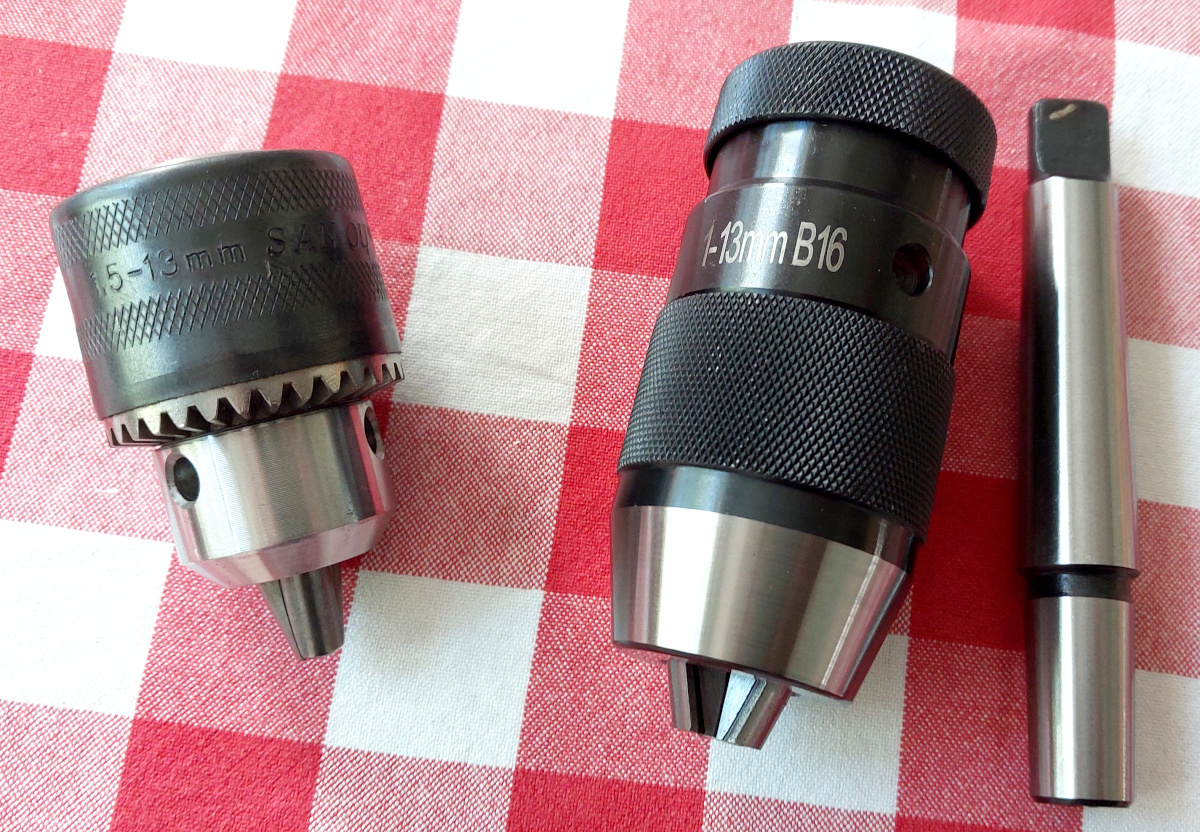
The chuck: This
is *not* a keyless chuck!!! Several online retailers
advertize the drill as having a keyless chuck, but that is a blatant lie
(if perhaps an untentional one perpetuated by copypasting the same description
again and again, through AI translation where necessary). However, the truth
is out there (on the Net)—and I was aware of the fact when
making the purchase, and was already preparing to replace the chuck with a
keyless one.
But let me just re-iterate here: The Scheppach DP55 does not have
a keyless chuck!
If you want a keyless chuck for the DP55, you'll need one with a
B16 taper bore (i.e. hole).
That will fit directly onto the B16 spindle taper of the drill press
("B16" was imprinted on the side of the original chuck), so
don't worry if the arbor (or "adapter", as it were) it's provided
with is MT2 or MT3 or whatever on the other side, or if there's no arbor
included. Just make sure the chuck itself has a B16 taper bore. I ordered one
from AliExpress. It's "Yunrux" branded, very cheap, but actually
pretty decent quality. But as you know with
AliExpress, Temu, eBay and such... Caveat emptor.
Replacing the chuck is described in the drill's manual. Essentially, it says
to grab the chuck with one hand, and with the other, use a 27 mm
spanner to tighten the nut above it (on the spindle, probably loose, looks
like it has no purpose whatsoever)
against the chuck to force it off the tapered spindle. In
practice, I needed to hold the chuck with a pair of big adjustable pliers,
as I tightened the nut against it. Using not an insignificant amount of
force, the chuck began to slide out and finally came loose.
|
|
Here's
the two chucks side by side, the Scheppach original ("San Ou"
branded) on the left, the new keyless one ("Yunrux" branded)
on the right. The arbor, which came with the new chuck, will go unused.
To install the new keyless chuck, just move the nut back
up to where it's not in the way, and slam the replacement chuck in.
(Yes, that is the standard installation procedure for tapered
chucks. Followed by a light hammer tap or two, if necessary.)
This is what the
DP55 looks like with the replacement chuck fitted.
The new chuck also does wobble a slight bit, just like the
original. Hard to say whether both are cheaply made (as they probably
are), or if the drill press itself is cheaply made (which it probably is).
But the keyless chuck is infinitely more convenient to use.
There is one disadvantage, though, to using this keyless chuck. Being quite
a bit taller, it gets in the way of one of the line lasers that make up the
alignment guides, rendering them useless. I guess I could move that laser to a
better location, but that'll be another project unto itself. For now, I'll
just make do without. I've been happily drilling with machines without laser
sights so far, I think I can survive without them in my home workshop as
well. I'm definitely not going back to the keyed chuck, that's for sure!
|
|
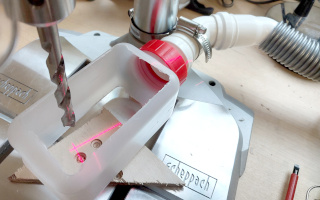
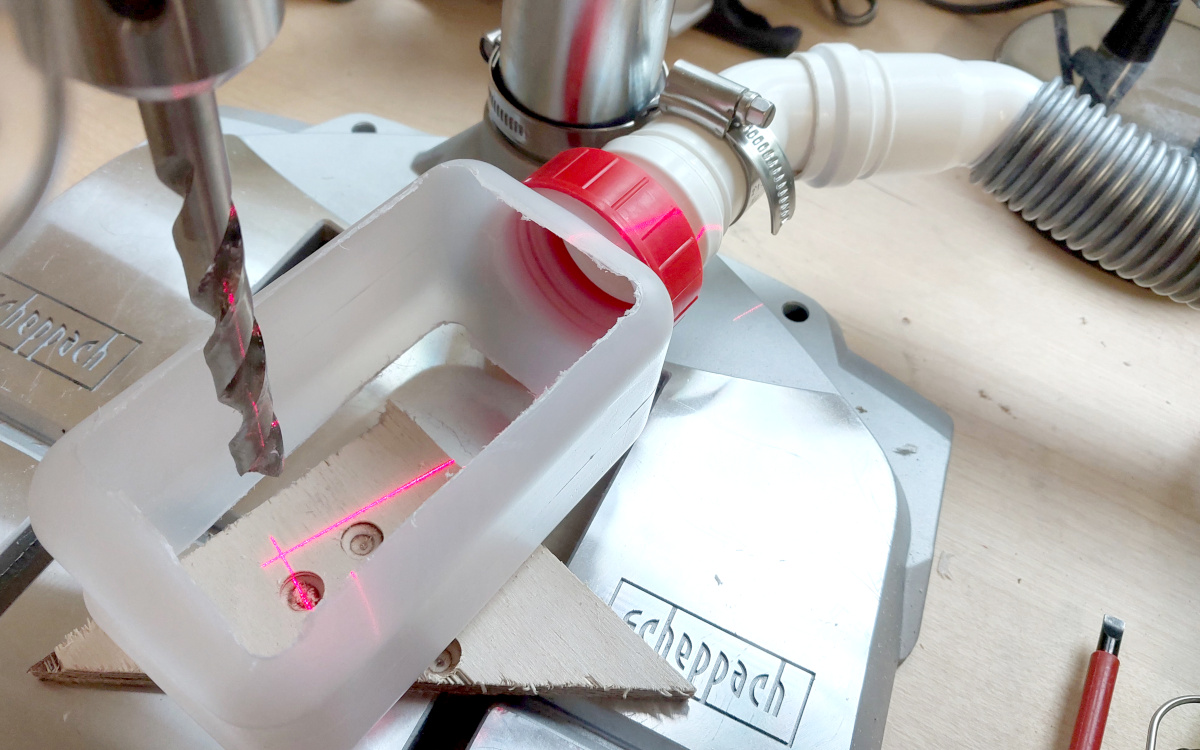
Dust collection: I had already made a dust
collection system for my Proxxon mini drill
setup, so I already had the vacuum cleaner and hoses. I simply took a
small plastic bottle of flattish boxy shape, cut out its larger sides, and
added a 32 mm sewer pipe fitting to its mouth (I use those to connect
to the vacuum system) to make this
localized vacuum attachment.
I then attached it to the column of the drill press
with two hose clamps. It's a bit rough to adjust, but it stays in position,
can be moved up and down as needed (though it cannot move further up than
the bottom end of the toothed rack—I may have to hack up a better
design some day, maybe re-purposing the original clamp the drill press came
with), and swings out of the way when not
in use. Easy peasy, very effective, and works with all but the tallest
work pieces and all but the biggest hole saws. (And it does not even
obstruct the laser sights either, unlike my new keyless chuck...)
When I do need the biggest hole saws, or have a crazy workpiece, the
entire drill press will fit into this
box which was the first design I built for my
dust collection system.
All of this would actually be overkill, if only I had an actual
workshop to make a mess in. But since my
workshop / lab / nerd cave / room
is crammed
full of stuff—computers, oscilloscopes, cameras, microscopes, lab
scales, CD players, books etc.—I just cannot afford to make a
mess with fine wood dust, for example.
|
Oh, did you come here for an endorsement? A clear-cut black-and-white
opinion? The best deal ever vs. steer clear? Sorry for wasting your
time.
